Kubla Cubed User Manual


Slope Element

The slope element is used to define a specified area with a uniform incline. This element is most commonly used for access ramps, sports pitches and run-offs.

The properties that are exposed for this element are summarised below.
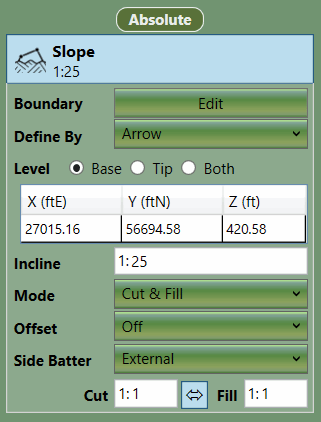
  • Boundary

    The Boundary Edit button provides access to the editor wherein the definition points can be defined for the points which define the outline of the slope area.

  • Define By

    This option selects the controls you use to define the slope incline and elevation. The '3 Points' option can be used to define the plane of the slope. '3 Points & Offset' allows you to accommodate for a construction thickness. The other options are 'Arrow' and 'Arrow & Offset. Using the arrow, you can specify a single elevation and an incline angle to define the slope or two elevations and allow the software to calculate the incline angle for you (for more details see below).

  • Level

    This table specifies the points with levels that define the slope.

  • Incline

    This shows the ratio of the incline after creating a slope. Or input the ratio required.

  • Mode

    This is used to specify if the element should have Cut, Fill or both. Most commonly Cut & Fill will be specified.

  • Offset

    The offset option is mostly used to add construction thicknesses by specifying a negative offset. The options are Off, Z or it allows you to offset the entire surface in X,Y and Z. This is useful for accommodating for a construction thickness or finding a balance.

  • Side Batter

    The slope boundary is joined to the ground by side slopes. The Side Batters (set as a ratio of vertical to horizontal), dictate the angle of these slopes. You can set the side batter to either External or Internal and specify different side batter angles for side slopes that cut into the ground and for those that fill into it. Turning side batter off will result in the slope being joined to the ground with vertical sides.

    Between the Cut and Fill ratios is a double-arrow button which, when depressed, will synchronise Side Batters.

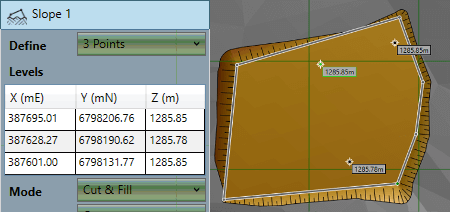
Option 1: Three Points

This option allows you to define a slope using three points. Three points explicitly define a plane. This option is more technical than the other options but can be useful if there are three elevations clearly marked on the drawing to use as reference.

Option 2: Arrow Base
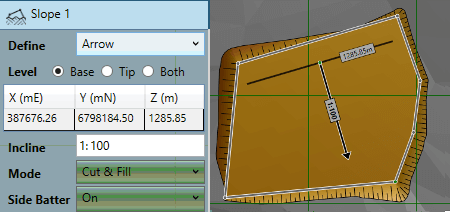
This option allows you to define the slope with a single elevation at the base, an incline angle and a direction specified by the arrow. The arrow position can be controlled by dragging the tip, shaft or base of the arrow. The length of the arrow has no effect on the slope with this option.

Option 3: Arrow Tip
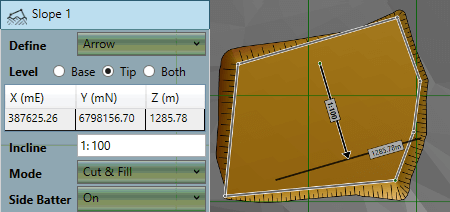
This option is similar to using and arrow and a base elevation but instead of specifying the elevation at the base of the arrow you specify one at the tip. Again, the arrow position can be controlled by dragging the tip, shaft or base of the arrow. The length of the arrow has no effect on the slope with this option.

Option 4: Arrow Both
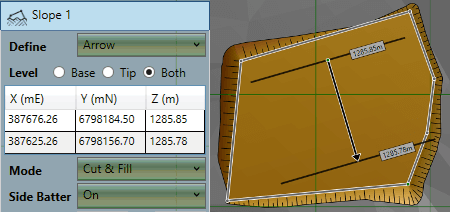
This option allows you to set the elevation of both the base and the tip of the arrow leaving the software to calculate the incline angle for you. This can be especially useful when creating ramps from one area to another when you know both elevations. You can move the arrow at the base and the incline of the ramp will adjust accordingly.


Proposed Earthworks : The Slope Element video demonstrates slope creation by setting the incline with the arrow tool or via three values. Learn how to build ramps, run-offs, and other sloping areas.